
Transforming the Fireplace: Brick to Quartz
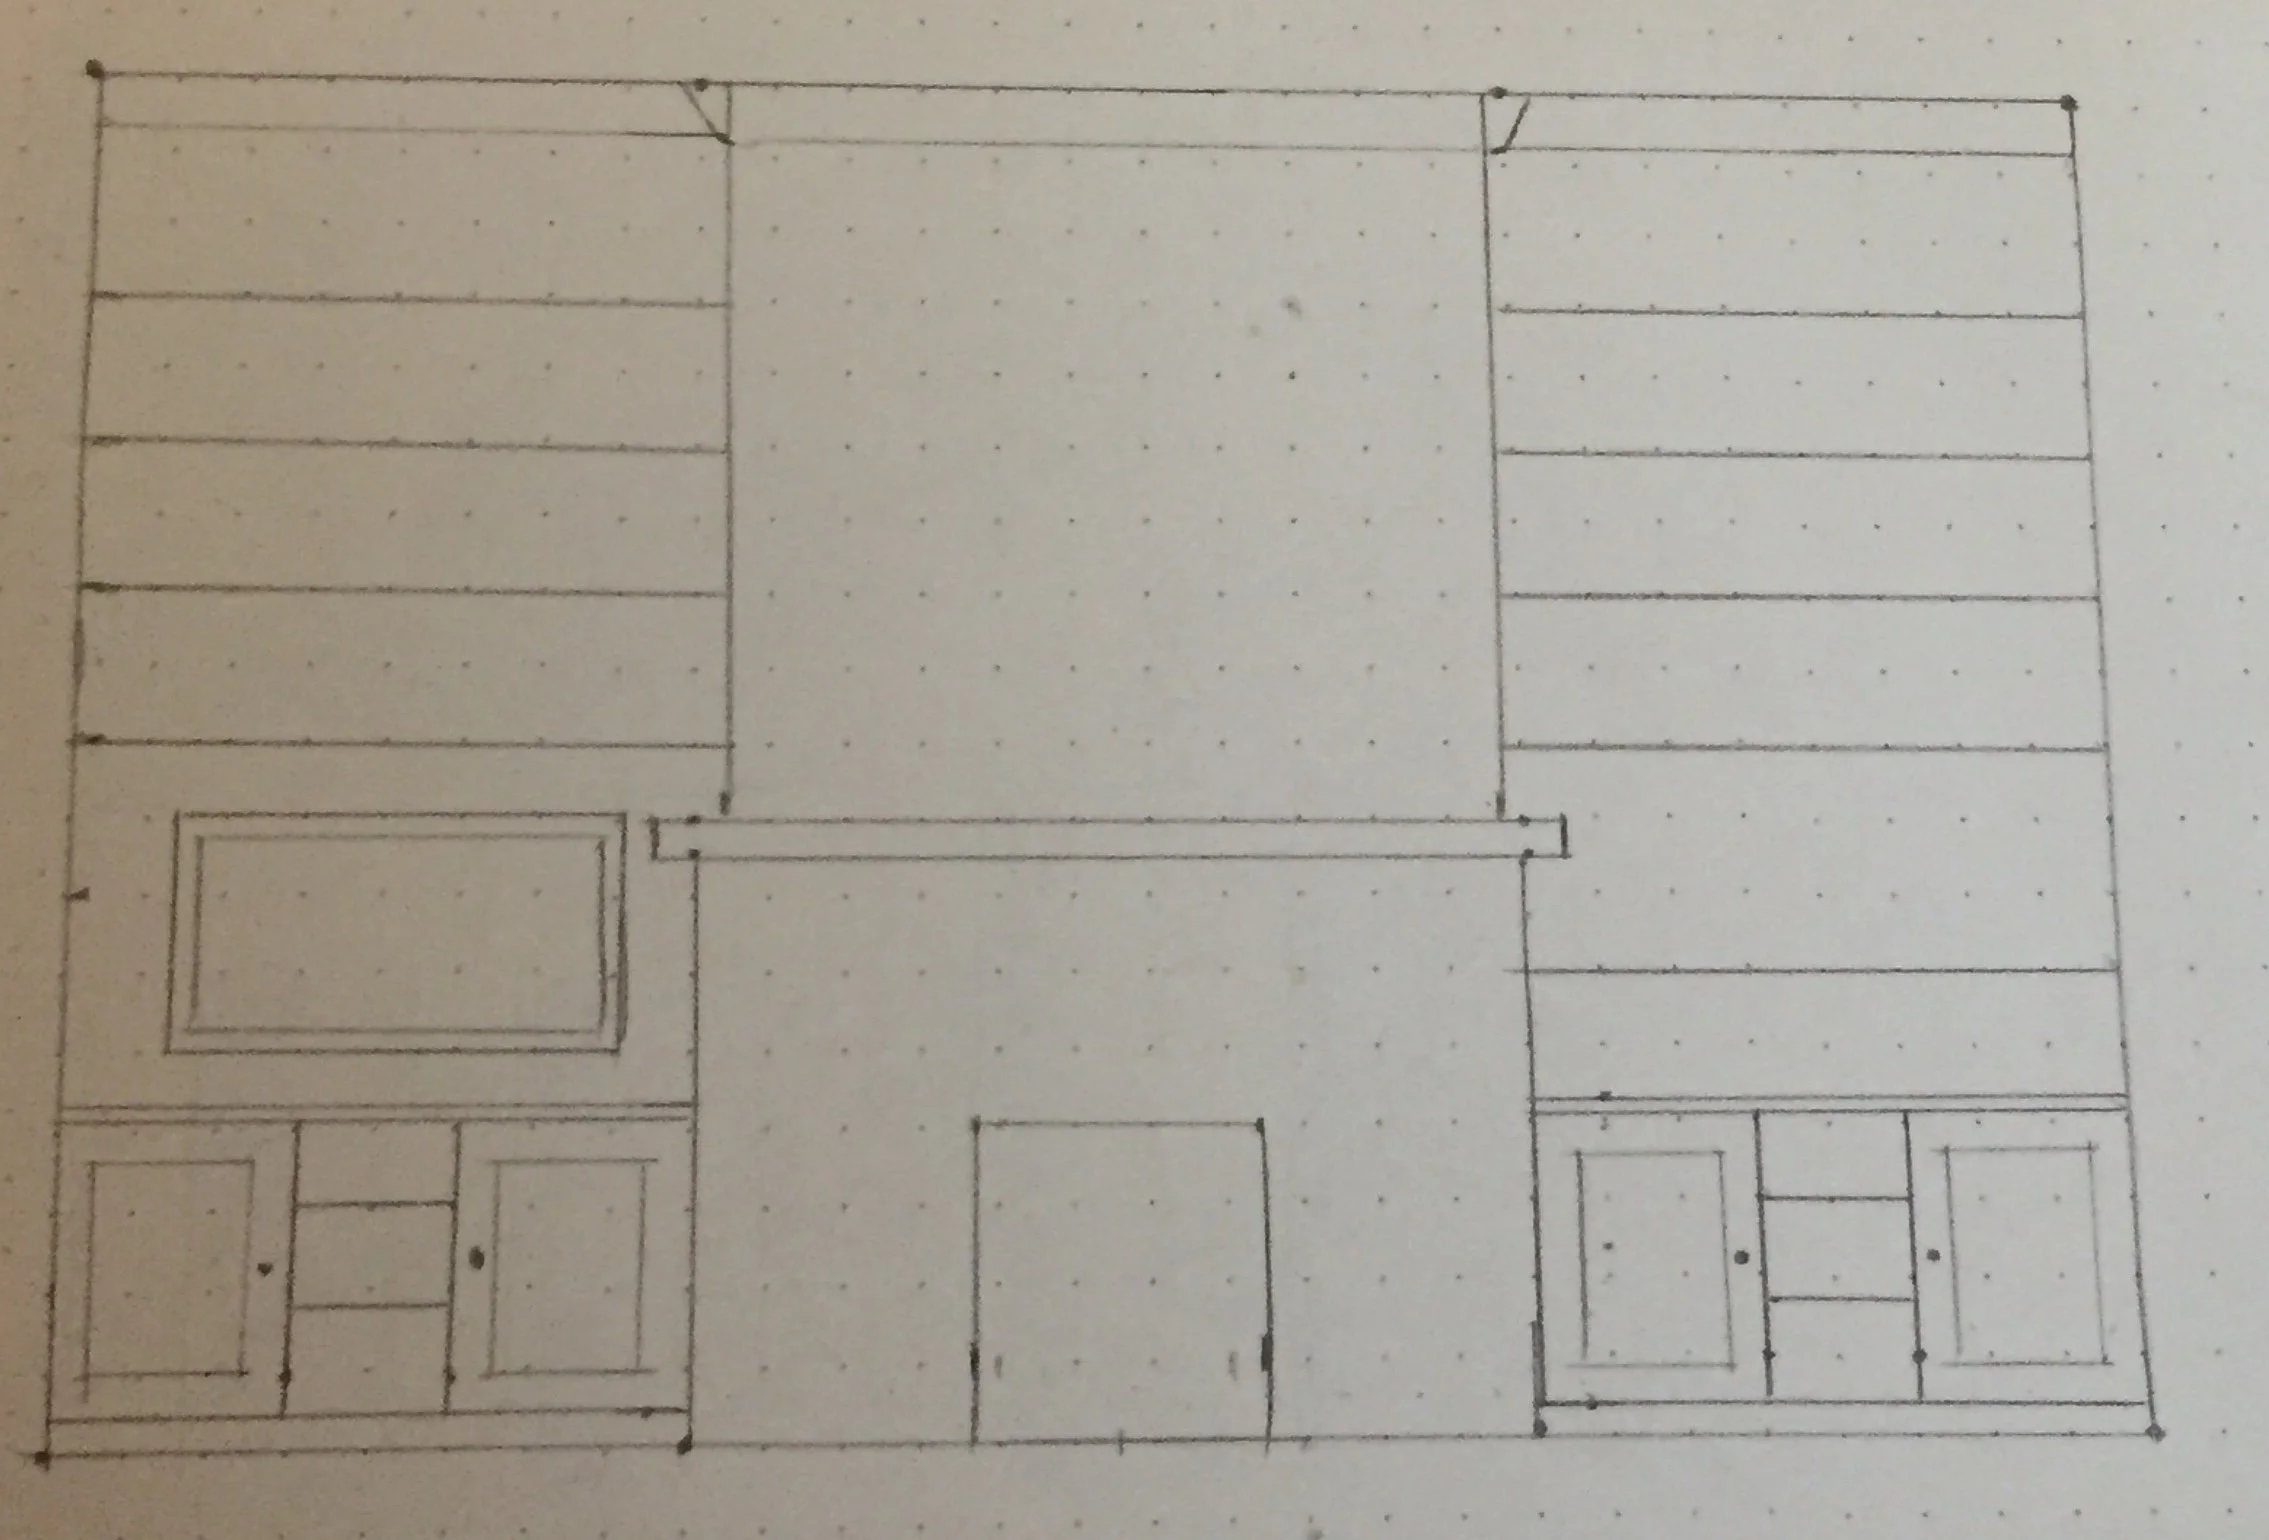
Original design of the fireplace, cabinets, and floating shelves
We eagerly embraced the idea of integrating built-in shelving and cabinetry around our fireplace, recognizing its potential to enhance both the aesthetic appeal and functionality of our living room. With a spirited 2-year-old in the mix, we also wanted to create a discreet space to stow away his toys, adding a practical touch to the equation.
While awaiting our structural construction permits, we decided to kick off a smaller side project – the fireplace. The deliberation process led us to opt for a ventless gas fireplace. Now, the ventless versus vented debate presents its own set of pros and cons. However, considering the relatively mild winters in Richmond, we decided that we wouldn't be firing it up frequently, making the ventless option the more fitting choice for our needs.


While maintaining the wooden mantle with a fresh coat of paint, we aimed to replace the terra-cotta tiles at the base and resurface the fireplace with white quartz tiles. We decided on a professional installation, placing our confidence in them for both the fireplace resurfacing and the installation of the gas insert. During the installation, we caught a mismatched white tile, prompting a quick replacement. The result looked great and we achieved the look we envisioned!
Felipe with super powers turning the fire on and off.
The outcome was more than just an updated fireplace; it set the stage for a future where built-ins with shelving and cabinets would seamlessly complete our living room. We added the cabinets and shelves later in the project (see below). Andres made the floating shelves so we’ll feature that process in an upcoming blog.

